Showing posts with label easy. Show all posts

May 21, 2012

Tuna Couscous Salad


The beginning of summer is always exciting! New veggies to eat, a grill to fire up, and for me new ways to try and save money. This week I wanted to try to cook with things I already have on hand. While clearing out the freezer and pantry for ingredients I saw a box of Israeli couscous and canned tuna. Immediately I knew I wanted to make a pasta salad. Searched the fridge for veggies to round out the salad and it was done! I challenge all you readers to see what you can do with what you have this month!

Tuna Couscous Salad
serves 6 for main course, 10 for side salads

Ingredients:
1 1/3 cup uncooked Israeli couscous
1 Tbsp. Olive Oil
1 clove garlic, smashed
1 3/4 Cups boiling water
1/2 cucumber, peeled, seeded, and diced
1 carrot, peeled and diced
2 peppers (red, yellow, or orange), diced
1/4 small red onion, minced
3 handfuls arugula, torn
2 cans water packed tuna, drained
1 can chickpeas, drained and rinsed
1/2 lemon, juiced
1/4 Cup olive oil based salad dressing (like Newman's Own Olive Oil and Vinegar)
Salt and Pepper to taste

mmm golden and toasty!

In a medium sauce pan heat olive oil on medium heat. Add smashed garlic and dry couscous. Toast couscous until golden brown. Keep a good eye on this, stirring constantly because it will happen fast. When toasted fish out the garlic clove and discard.  Slowly add the boiling water and stir together bringing to a boil. Cover and reduce heat to medium low and cook until water is absorbed.

This screams warm weather to me!

While the couscous cooks dice up your veggies and mix together in a bowl big enough to serve the salad in. My husband LOVES when I do this because it means less dishes to do later, and in our house I cook; he cleans! If you do not like the bite of raw onions and would like to mellow them down a bit soak the diced onion in a small bowl of water or a water/vinegar mixture for 10-20 minutes.
Not going to lie, I stole a bite or two after I snapped this one!

When couscous is done mix together with the diced veggies and add arugula. The hot couscous will cause the arugula to wilt down a bit, depending on your love of the peppery green you may want to add more. Add chickpeas and tuna. Mix in the juice from half a lemon, adding the zest if you want more lemon flavor. Season with salt and pepper and then add salad dressing to taste.

Yes, we had bread with pasta...but the veggies balance it out, right?

This can be served warm or kept in the fridge and served cold.  Easily made vegetarian without the tuna, but plenty of fresh veggies and protein for a main dish. This is going to my go-to for party dishes!


April 14, 2012

Black Bean Burgers with Sweet Potato Fries

Usually a cooking challenge is exciting to me. Our recession budget, eating meatless as often as possible, and healthy living are some I have tackled and documented here on this very blog. Unfortunately the new challenge in our life is not as fun and very unrewarding. Hubby has had some tummy issues lately so we have tried eliminating gluten as a solution. This has been very difficult for me as far as meal planning. We have been eating a lot of rice and making pasta includes two types for the new gluten free variety as well as my regular one. It has also increased our grocery bill - gluten free foods are at least two times more expensive! While its been harder on both of us, it does seem to be working and that makes the battle worth it. Tonight's dinner was so yummy I didn't even miss the bread!


Black Bean Burgers with Avocado Lime Sauce 
and Sweet Potato Fries

Ingredients:
1 16 oz. can of black beans, drained
1/2 cup breadcrumbs (unseasoned, panko, or crushed rice krispies)
1 Egg
2 tsp. Cumin
1/4 tsp. Cayenne pepper
1 Clove garlic, minced
1/2 Avocado, sliced
1/2 cup frozen corn, thawed
1/4 red bell pepper, finely chopped
1/2 shallot, finely chopped
2 tablespoons olive oil
Salt and Pepper to taste
2 large sweet potatoes, sliced into “fries”
1/4 tsp. each: cinnamon, garlic powder, salt, pepper
Pinch cayenne


Preheat oven to 400 degrees. Coat fries with 1 tablespoon of olive oil. Sprinkle with seasoning. Bake for 20 minutes, flipping once, until golden brown.

My little army of yum!

While the fries are baking, heat 1 tablespoon of olive oil over medium high heat in a skillet. Add garlic and shallot, cook until translucent. Add peppers and corn and saute until slightly browned, stirring every so often.


Mash 3/4 of the can of black beans until smooth. Add in breadcrumbs, egg, cumin, cayenne. Then add in the cooked vegetables and stir well to combine. Finally, gently add in remaining black beans and combine. Form into 4 patties. Set aside.


When the sweet potato fries have 5 minutes remaining, cook black bean burgers. Heat a nonstick pan over medium heat. Spray pan lightly with cooking spray. Cook black beans burgers about 4 minutes per side, until nicely browned, and cooked through. Top with avocado sauce (below) and serve with sweet potato fries.

obviously we hated this


Avocado Lime Sauce

Ingredients
1 ripe Haas Avocado
1 lime
1/2 cup plain, non-fat Greek yogurt

In a bowl mash avocado with a fork. Mix in the juice from one lime plus some zest, and the yogurt. Stir to combine. This does not keep well, use same day.

April 8, 2012

Sausage, Spinach, and Ricotta Pasta

This is an easy one! Several variations of this have become my go to for a quick weeknight dinner, it even warms up well for lunch the next day. As usual, anything with sausage is a winner with my husband. Luckily this comes with a huge serving of spinach and some healthy protein with the ricotta.


Sausage, Spinach, and Ricotta Pasta
serves 4-6

1 pound box elbow, shell, or other medium shaped pasta
1 quart part skim ricotta cheese
3 Tbsp. Olive oil
4 cloves Garlic, minced
Pinch red pepper flake
4 Sweet Italian sausages with casings removed
1 bag Spinach (about 4 cups uncooked), chopped into 1 inch pieces
Salt and Pepper to taste
 Cook pasta according to package directions. Drain pasta and reserve 1 cup cooking liquid.
In a large skillet over medium heat add 1 tablespoon olive oil. When the pan and oil are hot add sausage, breaking into small pieces. Cook until brown and slightly crisp. Drain sausage on paper towels.
 Return pan to the stove and reduce heat to medium low. Add the remaining olive oil, garlic, and red pepper flake. Cook until garlic is fragrant, about 3 minutes. Add spinach to pan. When spinach begins to wilt add sausage, ricotta, and pasta. Stir together and let cheese warm up.
Add reserved pasta cooking liquid to thin sauce. Season with salt and pepper to taste and enjoy!

March 6, 2012

Baked Mushroom Risotto with Caramelized Onions

This winter has been a pretty mild one for us New Englanders. I mean, with temps in the 40's through all of February it leaves little to complain about (don't get me started on the lack on snow!). But lately I have had trouble shaking the 5:00PM chills that come when the sun starts dropping. Bored with most of what I have been cooking lately for dinners I wanted to switch it up and make a stick to your bones, warm meal. This recipe has been pinned and repinned by lots of people on Pinterest (if you do not have one you are missing out!) It was originally posted on The Kitchn. After on friend posted a successful trial with the recipe I knew I had to make it. Totally worth it, and a big hit with the hubs.

I followed the recipe from The Kitchn, next time I would make several changes. Number 1, vegan shmeagan! I am using what I have on hand, no tofutti! If you need this for your particular diet please make the substitutions necessary for you. For me? I want butter next time! See below for my changes to the original.

PS. Thank you to my husband for the wonderful action shots taken while I was cooking!


Baked Mushroom Risotto with Caramelized Onions
serves 4 to 6

1/2 ounce package dried Porcini mushrooms, finely chopped and lightly rinsed to remove dirt
2 Cups boiling water
2 Tablespoons olive oil or butter
2 medium yellow onions, cut into a small dice (about 1 1/2 cups)
4 cloves garlic, finely minced
1/2 pound Cremini mushrooms, cleaned and sliced
1/2 sprig fresh rosemary, if you are not into this flavor substitute fresh Thyme
1 cup Arborio rice
1/2 cup dry white wine (I used Pinot Grigio)
1 Tablespoons balsamic vinegar
2 cups vegetable  or chicken broth
1 Teaspoon salt
1/2 Teaspoon freshly ground black pepper

That's a lot of mushrooms!

Heat the oven to 300°F.

Place the dried mushrooms in a ceramic bowl and pour boiling water over them. Set them aside to steep until needed.

Woo! Look at those onions go! Everyone into the pot!
Heat 2 tablespoons butter in a 3-quart (or larger) Dutch oven over medium heat. If you do not have a dutch oven or stove top safe casserole dish, feel free to use a stock pot and add to a casserole before baking. Add the onion and garlic and cook, stirring occasionally, for about 10 minutes, or until soft and golden.

I am still always amazed when things start like this...

Push the onions to the side of the pot, and turn the heat up to medium-high. Add all the sliced cremini mushrooms and let them cook for 5 minutes without stirring. Flip the mushrooms and cook for another five minutes, or until they are quite brown and a crust is developing on the bottom of the pan. Add 1/2 the salt.

....and reduce down to this!

Drain the dried mushrooms and reserve the steeping liquid. Add the mushrooms to the pan and mix in with other mushrooms.  Add the rice and cook, stirring once or twice, for about 5 minutes, or until the rice begins to turn transparent.

Ignore the rosemary here, I would save it for the end next time.

Turn the heat to high and add the white wine, vinegar, broth, and reserved mushroom steeping liquid. Stir and scrape the bottom of the pan to deglaze all the wonderful bits sticking to the pan. Stir in the remaining salt and pepper.

Bring to a boil. Add rosemary spring and cover the pan with a tight-fitting lid and put it in the oven to bake for 35 minutes. (if you are using a separate casserole now is when you want to transfer from the pot).

While the risotto is cooking, use this time to caramelize some onions to top. Recipe below. When the risotto has finished baking, let it stand uncovered for 5 minutes before serving. Serve a heaping serving in a shallow bowl with a  pile of caramelized onions, a little extra pepper and salt to taste.

After 35 minutes in the oven you are greeted by this inviting sight! mmm

Caramelized Onions

2 Medium Onions
2 Tablespoons butter, olive oil, or a combination of both
salt and pepper

Slice onions in half from root to top. Slice each half into strips, again root to top. This method helps avoid the creepy looking worm onions that happen with slicing into half moons. In a medium pan add butter, olive oil, or a combination. Heat over medium low heat. When pan is hot add onions. Sprinkle liberally with salt and pepper, and reduce heat to low. Continue cooking for about 20-30 minutes stirring frequently. Your onions should become a medium to dark brown. Try not to eat them all before the risotto is done.

June 22, 2011

Roasted Tomatoes Over Pasta

Looking at this list of ingredients I thought to myself, "I don't know about this, seems too simple." But MAN OH MAN was I wrong about that! Not only is this an incredibly easy dish, its so tasty! Using common pantry ingredients only makes it easier to throw together!


Roasted Tomatoes Over Pasta
Serves 4
Ingredients
1 pint grape tomatoes
3 cloves garlic, minced
3 Tbsp olive oil
1/4 C breadcrumbs
1/4 Cup Parmesan cheese, grated
Salt and Pepper, to taste
Handful basil, chiffoned
1/2 lb. thin spaghetti

Heat oven to 400 F. In the bottom of a casserole dish drizzle one tablespoon of the oil. In a small bowl mix together garlic, bread crumbs, cheese, salt and pepper. Slice tomatoes in half and place in casserole cut side up, top each slice with garlic-breadcrumb mixture. Drizzle another tablespoon of oil over the top. Roast in oven until breadcrumbs are toasted and tomatoes let out some juice. Meanwhile cook spaghetti according to box directions. When tomatoes are done toss with spaghetti and basil, add additional olive oil if the pasta seems dry. Season with salt and pepper to taste.


June 16, 2011

Roasted Red Peppers

After posting the pizza I realized I didn't let you in on the secret of making roasted red peppers! Better late than never!! And roasting peppers is FUN stuff!

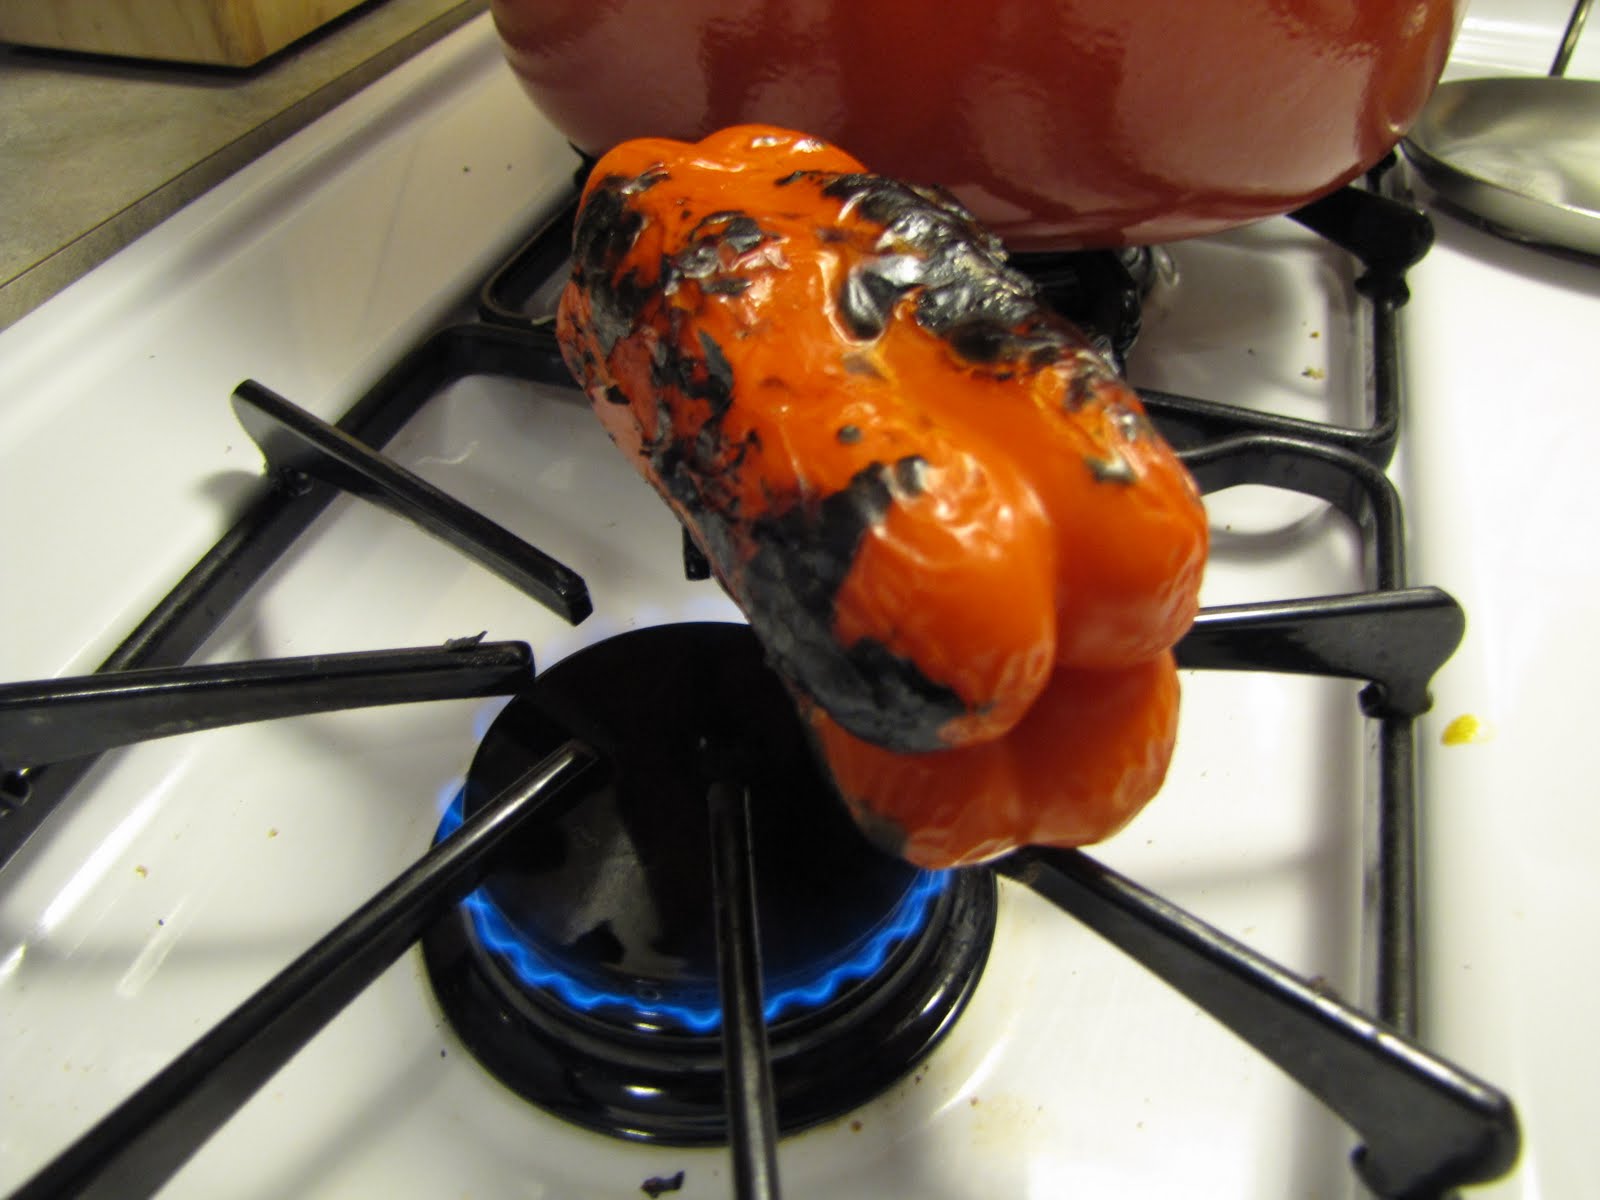
Good, charred, bubbled up skin!
First, wash the peppers and PLEASE remember to peel off any stickers! For a gas top stove, set your flame to medium-high, place the pepper directly in the flame and burn it to hell! For an electric stove, set your broiler to high, place the peppers on the top rack, and...you guessed it...burn 'em up! Slowly rotate and get each side equally charred. As soon as they are thoroughly charred place in a paper bag, crumple the top and let sit for about 20-30 minutes. This allows the peppers to steam, which pulls the charred skin away from the "meat" of the pepper. To peel the pepper, simply use your fingers to pull away the skin. Running the peppers under water while doing this will help the process. Seed and slice into thin strips and they are ready to use! Mine last about 3 days in tupperware in the fridge (if we don't eat them immediately).

Glorious, sweet and smokey, goodness!
A very simple, easy way to save money is to try and not buy prepared foods whenever possible. This means doing a little more work yourself, but they payoff is amazing food that you made!

June 15, 2011

Spinach Pesto Pizza with Roasted Peppers and Portobello


Pizza is always a good quick way to use up leftovers, but sometimes it needs to be mixed up a bit. I get easily sick of the "yooj." I had a leftover portobello cap that I wanted to use, and who doesn't like a good roasted red pepper? Add some feta and pesto, voila! This pesto couldn't be easier to make. Any leftover can be frozen to be used later in sauce, or on another pizza, even a pasta salad!


Spinach Pesto
Ingredients

1/4 cup walnuts
2 cloves garlic
1/2 pound baby spinach (about 10 cups)
1/3 cup olive oil
1/4 cup grated Parmesan
kosher salt and black pepper
1 tablespoon grated lemon zest

In a food processor, pulse the walnuts and garlic until chopped. Add the spinach, oil,  Parmesan, and ¼ teaspoon each salt and pepper. Puree until smooth, scraping down the sides of the processor bowl as necessary. Mix in lemon zest and parmesan.


Using my recipe for whole wheat crust, pesto, slices of the leftover mushroom, roasted red pepper slices, and feta cheese I put together a really amazing pizza! Paired with a salad made a delicious dinner!

June 14, 2011

Spiced Candied Nuts

Naked Nuts, haha!
Caution, these are highly addictive! Make in large batches to share or to hoard and eat alone! I made a batch for a girls' night and am making two more for my dad and my father-in-law for Father's Day. Its okay to splurge on the nuts, I bought bags of walnut pieces, pistachios, and almonds at Trader Joe's for $6 each, I don't think I would be able to put together a good party snack or two gifts for under $20!!

Spiced Candied Nuts

Ingredients
Mixed raw nuts of your choice, about 4 or 5 cups worth, unsalted
2  Tbsp maple syrup
1 Tbsp agave nectar
1/2 tsp vanilla extract
2 Tbsp raw sugar
1/2 tsp salt
1/2 tsp cinnamon
1/4 tsp cayenne

Heat oven to 400 F. On a baking sheet lined with wax paper or pachement arrange nuts in a single layer. Bake for about 15-30 minutes until nuts are toasted and fragrant, stirring every 10 minutes. Be careful not to let the nuts burn. While nuts are roasting combine maple syrup, agave nectar and vanilla in a bowl large enough to hold all the nuts. In a food processor combine sugar, salt and spices until ground to a medium fine powder. Pour the hot nuts into the syrup mixture, stir to thoroughly coat. Sprinkle half the sugar mixture over the top, stir gently, then add remaining sugar and stir gently to coat. Place nuts back on sheet pan and return to oven for approximately 10 minutes, or long enough for glaze to set. When nuts have cooled, salt to taste. Store in a covered container at room temperature.

Roasty Glazed Goodness!
Feel free to adjust seasonings to your taste, if you like things a little spicier add more cayenne, less spicy feel free to omit or add your favorite flavor. Enjoy! To give as a gift, fill a ball jar with nuts and top with a bow, nothing fancy to get in the way of digging right in!
heh heh, nuts!

April 20, 2011

Tips and Tricks for Successful Budgeting

I wanted to share some of my tricks for saving money and time when cooking. These will not only help you keep on track with budgeting and meal planning, but can also just make your week easier.

1.  Plan your meals for the week! I know this is said over and over, and I apologize for saying it again, but its true! To the best of your ability think out what you might like to eat each night - what dish or ingredient might work more than once. You do not need to stick to this plan, feel free to swap nights or even rework the menu with what you have on hand. Think of everything you need to make these meals and make a list of the ingredients. Take this list with you to the store and STICK TO IT! The more you do this the less often you will forget to buy ingredients needed throughout the week's meals.


2. Stick to your grocery shopping schedule. If you forget to buy something on grocery day, you know (and I know) you are not going to run into the store and buy ONLY that ingredient. You will see something delicious on sale and buy it, or think that good looking bunch of flowers would look nice on the table. This is not going to keep you on budget, try and eat what you have at home. If you forget to pick something up, see if you can make it work without it.

Grilling chicken for lunches, red sauce for the freezer, and soup for dinner!

3. While cooking dinner think, "is there anything I can prepare quickly to eat tomorrow or the rest of the week?" I like to prep snacks to have on hand. There is nothing better than wanting something to nibble on and already having it ready! While you are cutting veggies for a dinner cut a few extra to have with dip and make more salad for lunch the next day. When waiting for dinner to finish cooking put together a quick fruit salad, no work the next morning!

4. I always plan out how many meals I can get out of cooking once. What leftovers will this give me and how can I reuse them? Can this be frozen and served with something else for a new twist next week? Meatloaf makes great sandwiches, I will make it on a Monday so my husband has something healthy and cheap to take to work for lunch. Same with chicken; if I am already grilling two breasts why not just add two more and have a nice salad or wrap the next day? Besides, packages of chicken come in 4 more often than 2! I find having a variety of different sized Tupperwares on hand is a great way to save different portion sizes. I like these from Rubbermaid! Best part is the lids snap together and stack to save room in the cupboard!
Christmas Present from the Husband

5. Even though you are only cooking for 1 or 2 doesn't mean cut all your recipes in half. Similar to the tip above, why cook multiple times when you can just make something once (and do the dishes once too)! I love to make family sized batches of soup and sauce and freeze them. My meatballs usually last us 2-3 months! Much better than those frozen meals in the freezer section!


6. Freeze! Buy or cook or bake in bulk whenever you can and freeze it! Most meats can be wrapped individually in plastic wrap and foil, tuck into a Ziplock bag and it will stay good for 6 months. This is a great thing to take advantage of when chicken goes on sale buy one get one free! Also good for making large batches of beans in a crock pot or leftover from a can. Just toss into a Ziplock bag and freeze flat, easy to break off however many you need.

I hope these tips will help you save money and time! I sometimes screw up, or am just too tired to cook. When all else fails you can ALWAYS make breakfast for dinner!

April 19, 2011

Roasted Stuffed Mushrooms

This is an easy and quick meal that makes plenty for leftovers! Hearty, healthy and flavorful you will be making this one again!  Using ingredients we normally have on hand makes this even easier. I first saw this printed in Everyday Food, my changes are below.


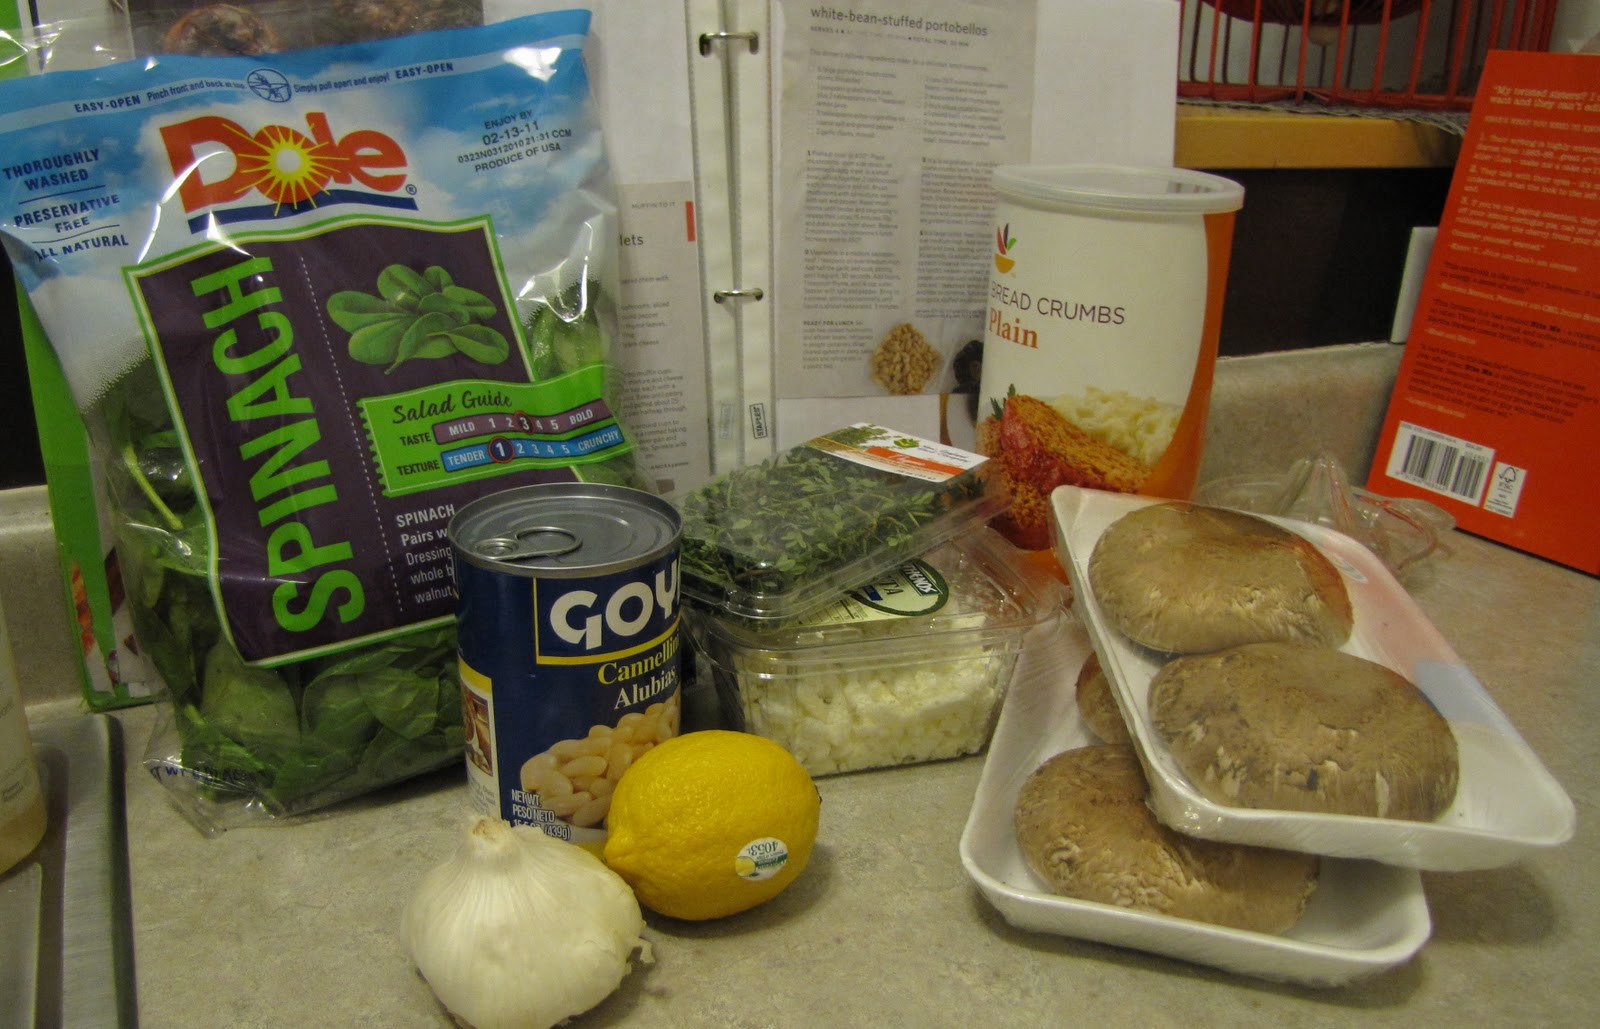
White Bean Stuffed Portobellos
Serves 2 (with leftovers for 2)

Ingredients
4 large portobello caps (stems removed)
1 tsp lemon zest
1 Tbsp lemon juice
3 Tbsp olive oil
2 garlic cloves, minced
1 can cannellini beans, drained
2 tsp fresh thyme 
1 Cup bread crumbs
1/2 Cup feta cheese crumbles
1 bag baby spinach

Preheat oven to 400F. In a small bowl combine 2 Tbsp olive oil and 2 Tbsp lemon juice, brush over each side of the mushroom caps, season with salt and pepper, place stem side down on a rimmed baking sheet. Roast for 15 minutes. Flip and drain any juices from sheet pan. Reserve two mushrooms for tomorrow's lunch.

In a saucepan heat 1 Tbsp olive oil over medium heat, saute garlic for 1 minute. Add beans, thyme, lemon zest and 1 cup water. Season with salt and pepper, stirring occasionally until liquid is almost evaporated, about 3 minutes. 

Top each mushroom half with a handful of spinach leaves, then 1/4 cup of bean mixture, layer of feta cheese and top with breadcrumbs. Drizzle mushrooms with remaining olive oil. Return baking sheet to oven and roast until breadcrumbs are golden, 5-10 minutes. Serve with a spinach salad and garlic chiabatta toast. 


For your leftover lunch, warm bean mixture and mushrooms. Top a spinach salad with sliced mushrooms and feta. Top a couple slices of toast with the warmed bean mixture.

March 22, 2011

Mushroom, Pepper, and Potato Frittata

This is a wonderful and easy dish to make for company, a quick dinner, or to use up leftovers from the fridge. Feel free to swap out the ingredients for what you have; add spinach, veggies, cooked meat, etc. Also warms up great the next day in the toaster oven!


Mushroom, Pepper, and Potato Frittata
serves 6


Ingredients
2 tablespoons olive oil
1/2 medium onion, halved and thinly sliced
2-3 red bliss potatoes, peeled and thinly sliced
1 pepper thinly sliced
1 clove garlic minced
Coarse salt and ground pepper
5 large eggs
5 large egg whites
1/2 cup whole flat-leaf parsley leaves
1 cup shredded sharp cheddar cheese

In a medium (10-inch) nonstick oven proof skillet, heat 1 tablespoon oil over medium heat. Add onion, potato, and peppers; season with salt and pepper, and toss to combine. Cover skillet, and cook 10 minutes; uncover. Add garlic and cook, tossing mixture occasionally, until onion and potato are tender, about 5 minutes.


Meanwhile, in a medium bowl, whisk together eggs, egg whites, parsley leaves, with salt and pepper to taste.
Add remaining tablespoon oil to vegetables in skillet. Pour egg mixture into skillet. Cook on stove, over low heat untouched for 2 minutes. Cook for about 10 minutes longer, lifting mixture a few times around the edges with a spatula to let egg flow underneath. Continue cooking until frittata is almost set in center.

Heat broiler with rack set 4 inches from heat.Sprinkle cheese over the top of the frittata. Place skillet under broiler; broil until frittata is set and top is lightly golden, about 3 minutes. Run a clean spatula around edges to loosen, then slide frittata out onto a serving plate, and cut into wedges.Serve with a mixed green salad and fruit.

March 7, 2011

Mushroom and Chicken Orichette

This dish is a staple in our house, some people may turn to cereal on nights they don't want to fuss in the kitchen, I turn to this. It is an easy meal, and there are no end to ways to sub out ingredients for what you have on hand. Use defrosted shrimp in place of chicken, add some spinach, spring vegetables would make a nice prima vera. If you don't have wine or choose not to cook with wine it comes out just as good. The recipe below is based on my measurements, it is not perfect, it even gets better with tweaking. Its an easy recipe to make your own, and impress friends and family!
 

Mushroom and Chicken Orichette
Ingredients
Serves 2

1 boneless chicken breast, split
4-5 mushrooms, sliced
2 cloves garlic, minced
2 Tbsp olive oil
2 Tbs butter
pinch red pepper flake
salt and pepper to taste
1/2 lb Orichette pasta, cooked (any small shape works well)
1/2 cup white wine (optional)
fresh chopped parsley (optional)
grated Parmesan cheese(optional)

Season chicken with salt and pepper. Heat 1 Tbsp of olive oil in a skillet over medium heat and cook chicken, you want it to be golden on the outside. Remove chicken from the pan, slice and reserve. Add the remaining olive oil and butter to the pan. Once butter melts add the garlic and red pepper flake. Once garlic is starting to become golden, add mushroom. When mushroom are cooked add sliced chicken back to the pan, turn heat up to medium high and add wine. Cook about 3 minutes, then add the cooked pasta and toss to coat. Serve with parsley and cheese if desired.

February 20, 2011

Party Favorite - Taco Salad Dip


I can't remember a summer cookout at my parent's house that didn't have a Taco Salad Dip. Now that I have made it myself for a girls night I understand why! Its comes together quickly, its cheap, and it tastes amazing! Make this for game day, or like I did, for friends getting together!

The more level you can get your layers the better!

Taco Salad Dip
Serves a crowd


Ingredients
1 package cream cheese
1 8 oz. bottle taco sauce
1 12 oz. can black beans, drained and rinsed (or 1 2/3 cup home cooked black beans)
1 medium head romaine lettuce, shredded
1 8 oz. package montery jack shredded cheese
3-5 jalapeno pepper slices
1/2 pint grape or cherry tomatoes, chopped

Let the cream cheese come to room temperature in a mixing bowl. Pour entire bottle of taco sauce over this and beat with mixer until well combined. Spread mixture in the bottom of a 9 x 9" pan or similar sized container. Layer the black beans, tomatoes, and lettuce. Finish with the cheese. Garnish with chopped jalepanos. Let this sit in the fridge for about 1 hour before serving. Serve with tortilla chips and a spoon!

A couple of things to note, this is not a make ahead dish. It comes together quickly and can sit for about 1-2 hours before being served, it will get soggy if served the next day. If you want more spice try adding some hot sauce to the cream cheese mixture. This does well in a square glass container with no slope to the sides. You want to layer the ingredient level, it looks so pretty this way! While I don't recommend serving to guests the next day, save it for yourself, it still tastes good!